JavaScript Testing with Jest in IntelliJ IDEA
JetBrains IntelliJ IDEA is the best IDE I have ever worked with, and I guess don’t ever want to use anything else - or the tool I would prefer to use instead is yet to be invented.
Where it all started
Most of the time, I used IntelliJ for Java development. Everything just works, right out of the box. Awesome! However, then there is this moment where you use something else, Node.js for instance. And, of course, you want to use it with the same ease.
For run configurations to execute the application, everything is fine. Right-click on the application’s main *.js file and it runs. Great!
What about tests? In Java projects, I do a right-click on the test sources root, and it just works. IntelliJ runs JUnit and I can easily select which tests to run, etc.
Moving on to JavaScript/Node.js
Okay, let’s get away from Java, let’s set up a Node.js project, add a __tests__ folder, and use Jest for delightful JavaScript testing.
That’s easy enough:
$ npm init
// ...
// Answer some questions and finish the initialization of the new project
// ...
$ mkdir __tests__
Configure Jest
Now, we just need to configure Jest in the package.json file to run our tests:
{
  "name": "hello-jest",
  "version": "1.0.0",
  "description": "Just a sample on how to run tests with Jest",
  "main": "index.js",
  "scripts": {
    "test": "npx jest"
  },
  "author": "John Doe",
  "license": "ISC",
  "jest": {
    "verbose": true,
    "testEnvironment": "node",
    "testRegex": "(/__tests__/.*|(\\.|/)(test|spec))\\.jsx?$"
  }
}
Before we go on, we probably want to ensure you have Jest installed on our machine:
$ npm install -g jest
This is all we need to set up. Easy enough, right?
A First Test
Let’s quickly add some sample test so that we actually have something to run:
Since we configured Jest to run tests that match a certain regular expression, we create a new file in the __tests__ folder and name it hello.test.js:
describe('Example Test', () => {
  it('ensures 1 + 1 = 2', () => {
    const a = 1
    const b = 1
    const c = a + b

    expect(c).toEqual(2)
  })
})
Run the Test from the Command Line
To actually run the test, head back to the command line and run this command:
$ npm test
You should get some output like this:
> hello-test@1.0.0 test /Users/andreas/Documents/development/hello-test
> npx jest

 PASS  __tests__/index.test.js
  Example Test
    ✓ ensures 1 + 1 = 2 (3ms)

Test Suites: 1 passed, 1 total
Tests:       1 passed, 1 total
Snapshots:   0 total
Time:        0.79s, estimated 1s
Ran all test suites.
Set up the Project in IntelliJ
I love the command line but, as I already said, I also like my IntelliJ IDE. During development, I would like to be able to run tests often, selectively, and as easily as possible.
Therefore, I want to use my favorite tool to work with our little project. If we did not create the project in IntelliJ already, we have to import the project there.
Go to File > New > Project from Existing Sources… and navigate to the directory containing the project we just created.
I select the package.json file (I import Java projects selecting the pom.xml Maven file) and click Open.
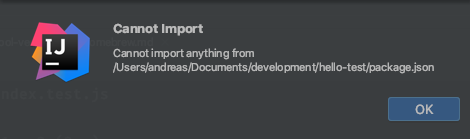
Cannot Import anything…
Well, that is not exactly what we wanted to happen, right?
Next, don’t select any particular file, just navigate to the project folder and click Open. That should work and you can proceed clicking Next until there is no option to click Next anymore.
Lesson learned: If you import JavaScript projects in IntelliJ, always select the project folder!
Use IntelliJ to Run the Tests
Now that we were able to import the project successfully, it’s time to run the tests again.
No Working Default
Above, I said it’s possible to run Java tests from the context menu. Trying the same for a JavaScript project doesn’t seem to be that successful:
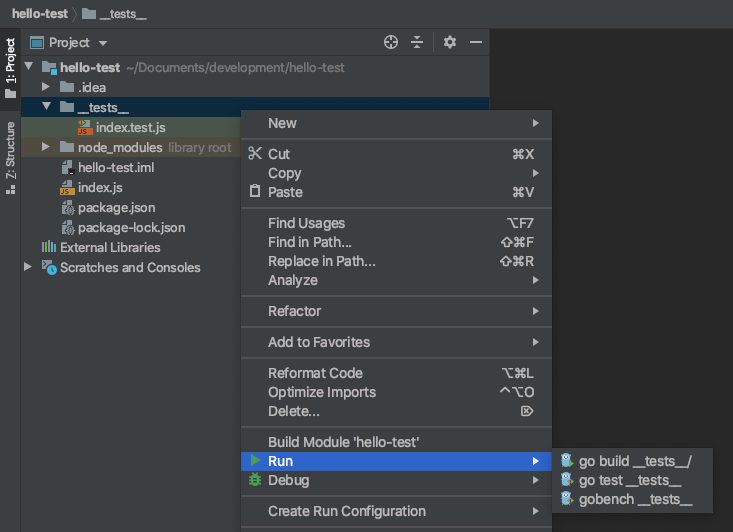
Nothing to run here…
Unfortunately, the cute little Gopher won’t be able to help us with this problem.
Given the wide variety of JavaScript frameworks and libraries, it’s not really a surprise that there is no working default run configuration, though.
Marking the __tests__ folder as “test sources root” also doesn’t change anything, by the way - except for the icon turning green.
Create a Run Configuration for Jest
So we have to head to the top-right corner to edit the run configurations and add a new Jest run configuration.
For that, we will have to enter the path to the Jest installation. This had been displayed after installing Jest:
$ npm install -g jest
npm WARN deprecated resolve-url@0.2.1: https://github.com/lydell/resolve-url#deprecated
npm WARN deprecated urix@0.1.0: Please see https://github.com/lydell/urix#deprecated
npm WARN deprecated request@2.88.2: request has been deprecated, see https://github.com/request/request/issues/3142
/usr/local/bin/jest -> /usr/local/lib/node_modules/jest/bin/jest.js
+ jest@25.3.0
added 484 packages from 287 contributors in 24.374s
The path that we will need is /usr/local/lib/node_modules/jest.
Don’t worry if we didn’t capture that.
It’s just in the default root path for NPM packages,
and we can check the configuration for that pretty easily:
$ npm root -g
/usr/local/lib/node_modules
With that information, we can configure a new run configuration for Jest.
Click the + Icon and type to search for Jest.
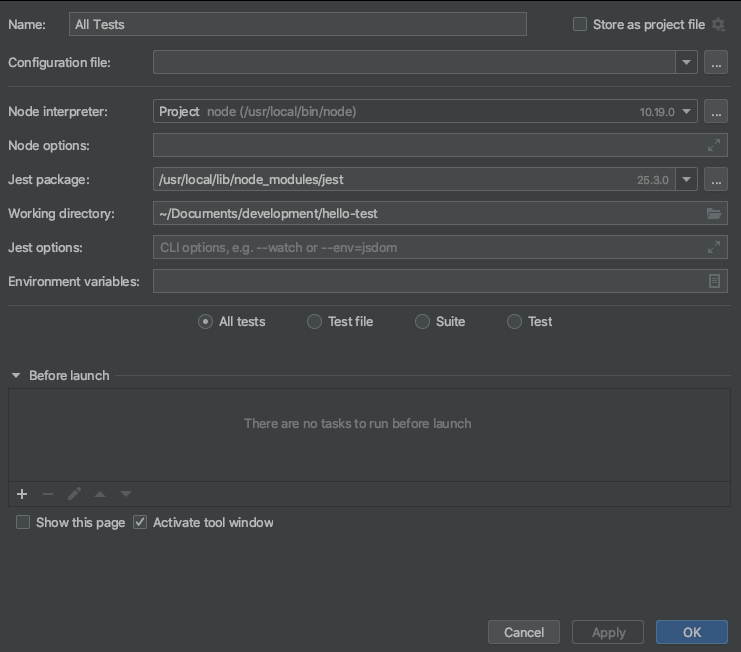
Jest Run Configuration
There is not much we have to configure here, just:
- set the path to the Jest package
- make sure the project directory is set as working directory (default)
- select All tests (default)
Regardless of the fact that we installed Jest globally to be able to use it from the command line,
we should also add it to the devDependencies in package.json:
$ npm install --save-dev jest
Otherwise, we will not be able to use the run icons in the gutter next to the source code to run our tests.
This also means that we could configure the node_modules directory from the project as the Jest package location for the run configuration.
Lesson learned: Defining a package location in a run configuration alone does not mean that we can use all nice features of our IDE with that.
That’s it! We are all set to run all tests within our project within IntelliJ using the new run configuration.
Simply press Ctrl+R (or Ctr+D for debug mode) to run the tests.
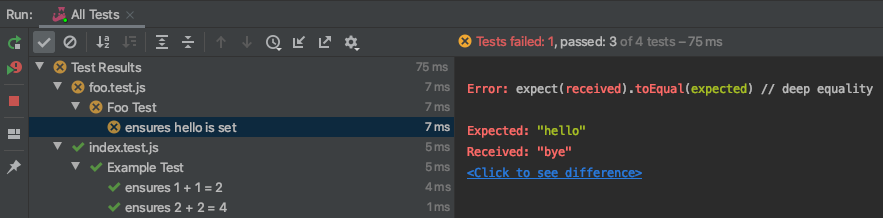
Add a few more Tests
Whether we create another test case or test suite within the same file - or even additional test files - doesn’t matter. The All Tests configuration enables us to run all tests in our application in IntelliJ regardless of where they’re located - just like from the command line.
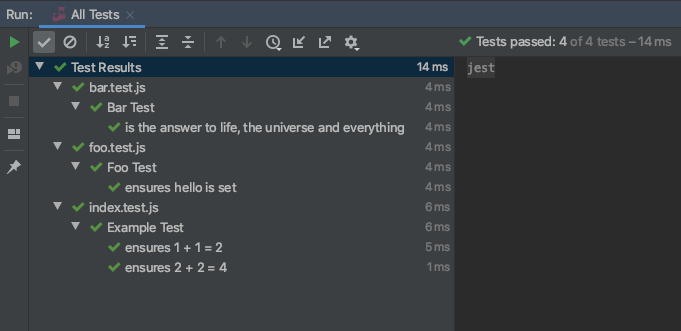
All tests run…
Selectively run Tests
Different from the command line, we’re not restricted to running all tests all the time, though. We also have the debug mode right at hand and can specifically decide what to run or debug right next to the source code:
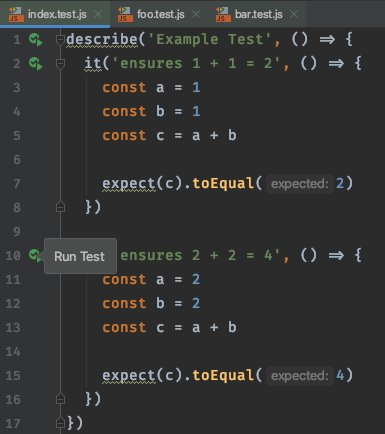
Selective test execution under full control
With that, we have all the magic I was used to in my Java projects available in a Node.js JavaScript project.
Bonus: Live Testing
During development, we usually want to run our tests reasonably often to notice when changes break something as soon as possible.
Jest got us covered: It provides --watch or --watchAll flags that allow us to rerun the tests whenever something changes in the source code.
We will not be able to use --watch if the project is not a Git project but --watchAll will do the trick in that case.
Oops, something broke - automatically rerun tests on code change
Isn’t that awesome?! It’s also something I did not know from my work in Java projects. On the other hand, that’s just because I didn’t know about the Infinitest plugin so far.
Summary
In this article, we’ve seen how to
- initialize a new Node.js project
- install and configure Jest to run tests
- import the project in IntelliJ IDEA
- add a run configuration for Jest tests
- selectively run or debug tests in IntelliJ
- watch source code for changes and rerun the tests
Happy testing!